
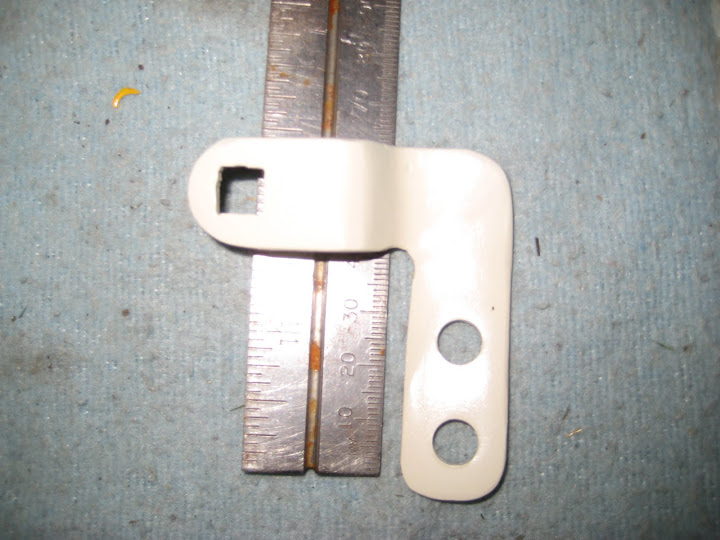
↩ BackDIY Convertible Folding (Scissor) FrameI love fabrication-work to keep my hands busy - i decided to build my own scissor frame. but with just pictures, it was too tricky, so i bought one from Mexico. it came (i think it took ~1.5 months to arrive. i did this to save time, but i was not thrilled with the fit or quality. i guess i have high expectations. so i cut and welded two round turn buckles in the middle of each bow. It fit better, but i wanted it to fit like a glove and that would require more fabrication. at this point, i decided to start with my own design and make one to my standards, but use the one i have as a working example. really take my time and make it look sweet - you know ... So, the first step was to fabricate the main mounts. buy some metal stock (3/8" wide) - not thicker is needed - it's not a roll-bar). bend it, drill some holes: 
file holes for carriage bolts: 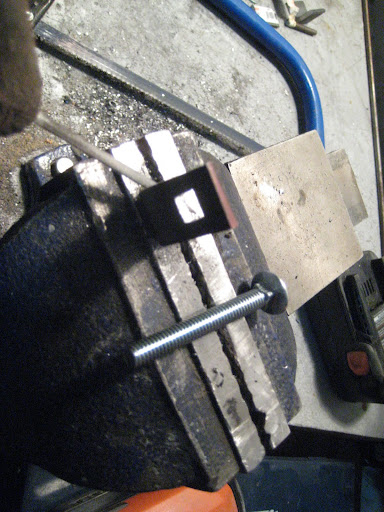

scribe said carriage bolt so i could grind flush: 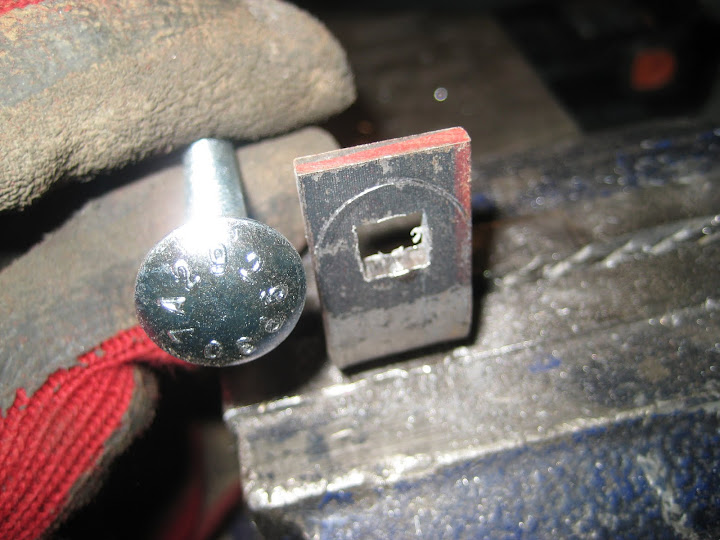
mount for welding: 
weld and grind welds smooth: 

grind smooth: 
bend (and i decided to re-weld the back for strength) 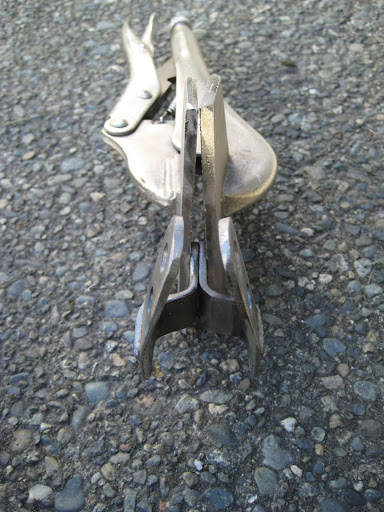
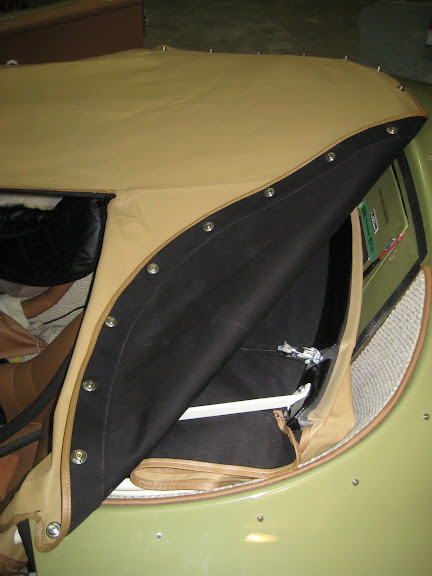
test fit (yes, i plan on drilling for another mounting bolt. there is torque on this setup): 
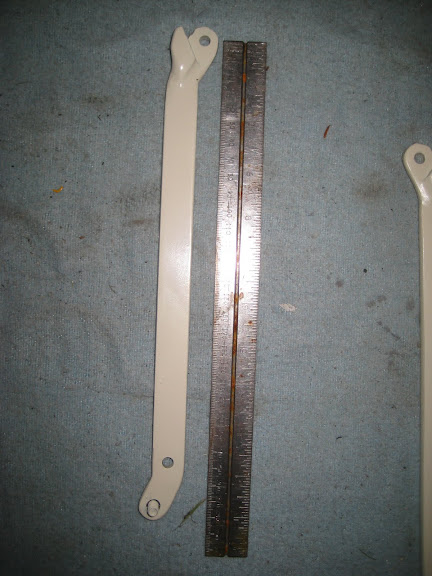
next is the main linkage arm for the hoops (cut, scribed and ground): 
both: 
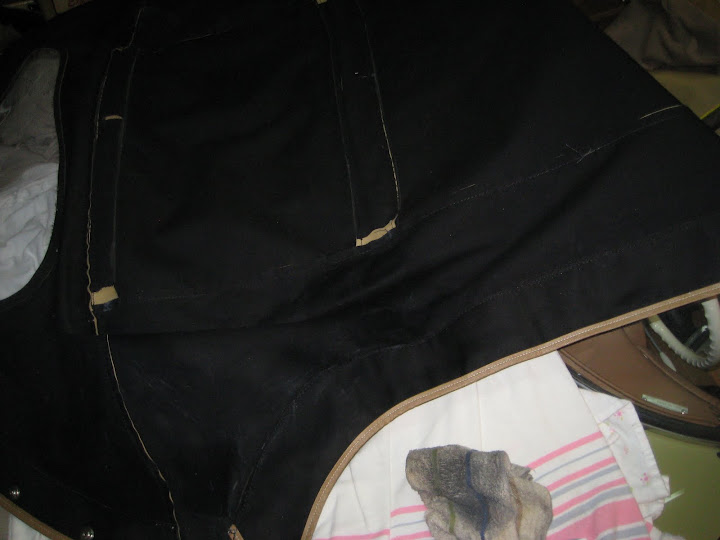
i want to get the hinge fully sorted to i roughed up the design:  with nylon washers:  back:  this is actually trickier than i thought it would be... finished off the main mounts / pivots and drilled holes for the additional mounting hole. i took all the hardware back because it had weird little symbols on the carriage bolt heads and i found some that are stainless that are smooth. small details - i know, but... why not eh? $12 credit - $21 in new hardware. (oh - i bought new nylon washers too. nice and snug and a bit wider --- anyway - i decided to start with the back bow. start by getting the back as tight as possible. reason i started by saying it was tricky is i am working with an existing top, with existing tennax fasteners, and an existing header bow with triple latch mounts. the only area for 'tightness' adjustment is the shape and 'size' of the bow. i was able to get a wickedly low/flush fold down - which i was also going for. i want to run a toneau without much of a budge of a frame. we'll see about that. i may be wishfully dreaming. enough words - here are some pics. please dont think that mount will be the finished product. i'll make it waaay nicer once i get the geometry right. i'm a little concerned about headroom, so i may need to modify my first design:  second main mount bolt added:  disregard the front bow - it's not doing anything but getting in my way:  flush fold down:  front bow loose in this picture:  rear bow attached. i may fiddle with the shape of the bow (which BTW is the same shape as the front). i'm going to sleep on this for a few nights and see what i come up with:  that's all for tonight. ok - i managed to get another 2 hrs of garage time tonight. re-bent the rear bow to make it fit tighter then went to work on the front bow. i tried 2 different shapes. the rounder one was MUCH better, but i need to take some of the top roundness out (flatten the top so it doesn't pull the vinyl)  once i got hte shape i wanted - i measured and measured and measured - then cut  pretty much final front bow (i'm gunna flatten the top ~1/4" still):  tightened all the stuff up and clamped the front bow (remember - this will eventually be pretty. i'm going to paint it all ivory - keep all the hardware stainless and separate with vinyl washers):  then - to add the final tightness whatchamadinger is my oh so elegant pipe insulator. LOL  it's not installed in this pic (and you can see why i need to flatten the front bow a shade):  Now that the hard stuff is nearly out of the way - i can't wait to get to the folding mechanism. it sounds tricky, but once the bows are nailed - the rest is (should be) pretty straight forward. That's it for tonight. oh ya - i should mention how i flatten the ends. i literally put them on the garage floor and bang with a rubber mallet to get a gradual transition from round the flat. then i finish it off in a vice (with soft-jaws so it doesn't make the crap out of it when i squeeze it) 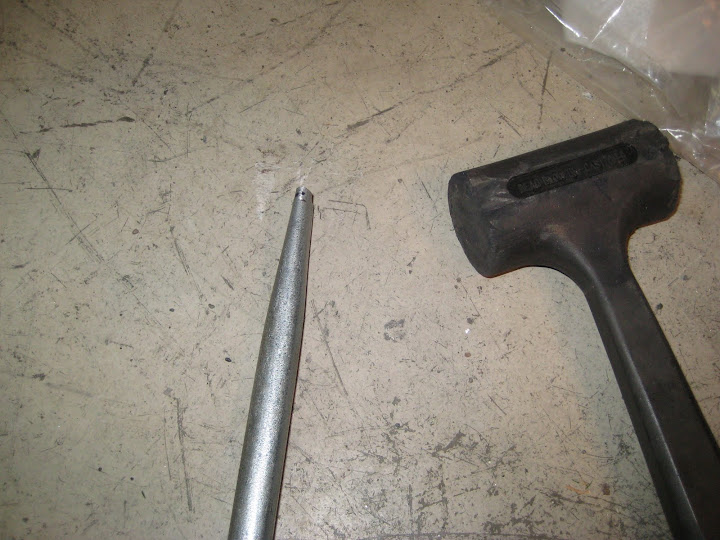
it's truely fun and i enjoy the working with my hands aspect. i do brain work all week (and sometimes weekends - boooo), so problem solving and fabricating something incredibly tangible is awesome. thanks for the kind words. --- now - on to progress. i got me a solid hour and a half of garage time tonight. i welded up the front hoop adjuster and welded it to the main pivot. then i latched the front header to the windshield and tenax'd the floppy top to the car (with the two bows folded down, installed) i then crawled in the car and folded it up where the bows would fit into the top. ahhhhhhh yaaaaaaaa. apparently all the anal measuring i did paid off. tight as a drum. literally. i dragged my wife out to the garage and boomed (like playing drums) on the top all over it. i'm pleased. even cooler was how it articulates. it folds down a LOT lower than i had hoped. this means with the top on / folded and all the rest of the frame fabricated, there is a very good chance that it will not be higher than the edge of the body. (ie: i can run a tonneau with no budge) anyway - i have pics, but i'm on my laptop, so i'll post them when i can upload them. by far the hardest part is not 100% over. :) that's it for tonight. i started fabbing up the front folding pivots. i've kinda been procrastinating this cause i wasnt sure how/where to start. driving home from work today - i figured it out. here are some pics: main hoops tack welded. (never mind the old paint on the inside - i'm going to clean that off)  turn buckle installed / adjusted:  then i measured the front folding frame tabs and used 1/4 painters tape to 'gut check' it:  tabs getting the proper shape marking:  tabs all measured and drilled:  oops - now they are drilled:  making the carriage bolt mount:  all 4 done:  --- next is cutting - welding, but not tonight. well, my 4 day weekend doing an insane amount of yard work is pretty much over and this is all i have to show for it for fabrication:  seriously, these little buggers took a fair amount of time to make.
they are the 4 pivots on the main hoop. i wanted to spend time and
match the circumference on the stainless carriage bolts. then a quick
zip with a sanding disc to make sure the metal is ready for welding (and
looks cool).
seriously, these little buggers took a fair amount of time to make.
they are the 4 pivots on the main hoop. i wanted to spend time and
match the circumference on the stainless carriage bolts. then a quick
zip with a sanding disc to make sure the metal is ready for welding (and
looks cool).
made some really good progress tonight. i am feeling like I'm close to the home stretch in figuring this rubix cube out. doesn't look like much, but this is the main folding mechanism that attaches to the front bow. look how flat it folds (i made some tweaks to the design - hope it doesnt come back to bite me. :) anyway - the welds are not that pretty, but i cranked up the welder to get uber penetration as i'm going to be doing metal art on these (smooth, rounded, etc) oh ya - don't grab the metal you just finished welding - even with mechanix gloves on. 1 second... sh!t anywho... measurements for the DIY-ers:  ground clean, clamped:  part 1 of 2 welded:  part 1 of 2 drilled to the same geometry:  part 2 of 2 welded:  trial fit. i am going to not do the front bow attachment until last: 
oh - here's my improvement:  it should fold down nice and tight closer a lot closer being a sunny Sunday afternoon - i made LOTS of noise in my neighborhood with the grinder. did some cutting and some bending (more like banging) on the front folding setup. a surprising amount of geometry in this. more than once i found myself literally scratching my head... got all the geometry mocked up then ground the welds down and flap-disc'd the metal to make it look like one piece of art: from this:  to this:  and to this - finished them off:  measurements for the DIY-ers (this literally would have saved me hours and hours if i had this before):  mocked up (note i left the bottom mount/bar end thingy unfinished as i'm going to tie in the rear bow folding setup. if you got any of that):  folded up nice and stoopid tight (you can see the unfinished end on the lower pivot bar - that is going to be extended):  a side view to show how these all line up:  problems tonight.... (insert pissed off icon here) i didn't have the geometry right on two of the three pieces i prepped so nicely above. i had to weld up a hole and do some serious mockup with the top up/on. pretty time consuming. i didn't have the front hoop pivot points (fancy little tabs) in the right spot and i was scratching my head as to why it did fold like i was expecting with the top up (front hoop where it slids through the top) pushed a little harder and pop - my little spot weld popped off (note to DIY - this is why you spot weld it together and fully weld when it's finished) good news is that it became instantly apparent where my mistake was. physics has a way of doing that. :) so, i unfortunately need to cut/grind/weld more. all of which are not hard and i enjoy doing, but my garage time is only when my little stinker is sleeping. anyway - one step forward tonight and two steps back that had to happen. no pics cause everything is a mess right now. thanks. it's nice to see folks still watching this thread too. i am itching to work on this. since most of the time i'm working on this right before bed - i seem to dream about it. last night was no different and as a result, i know exactly what i need to do. only thing i am nervous about is tack welding the frame to the bow. i've already mounted the bow plate, but the idea of welding over my interior is NOT appealing. I have to do it to get the geometry right. just a quick spot weld - with gas, so there will be little splatter. lots of wet blankets. --- Funny - now that i look at it - i see the top mount pulling the arm more than it needs to: -- oh, and Lane - welding is actually pretty easy once you know the basics and how to setup a welder. i learned 2.5 years ago with a 12 week (2 nights/week) college course. best $$ i've spent on myself in a long time. well, another few hrs in the garage and I'm making serious progress now. i fiddle-farted with this stuff to get the geometry in the ball park:  then took the welder out and spot welded a few times until i hit the sweet geometry spot) check this out (the top, not the amazingly clean garage):    honestly, i don't think it's physically possible to fold down any more flush. the header bow is going to peak above and i can't do anything about that (at least that i can figure out) the rear bow to front bow metal connector /pivot is just round metal sstock right now. i kept going through 3/8" metal trying to get it right then i figured i could bent the round in 2 directions and it's easy to cut/file. i may keep it (after i clean the whole thing up - welds, etc). i'm going to sleep on it. that's it for tonight folks. going to bed with a smile on my face. holy crap it's so much faster doing the other side. how long did it take me to do one side? 4 weeks (of evenings and weekends)? the other side pretty much nailed in 1.5 hrs. i put some metal rod through all the bolt holes to match up the geometry perfectly added more weld to my spot welds (just need to grind them smooth now) getting closer! finished the passengers side - including the bow mount. i decided not to tempt fate and weld above my interior. i held the metal there and took a good mental image (you know - the kind when a hot chick (or dude if that floats your boat) walks by) and then took the metal and spot welded it as close as i could. then cooled it off, put it back on the frame and saw how far i was out - took it off and bent with pliers - installed, etc - you get the idea. got it perfectly fitting & angled - then welded the crap out of it. :) cooled it off and installed. i decided to grind stuff smooth after all fabrication, not as i am doing it. i had to weld up some hold on some of the front folding mechanism, so i didn't want to waste any more time/neighborhood noise. also - i decided not to use round stock to connect the rear bow to the folding mechanism. i used 1/4" flat and bent it all last night. i know pictures are nice, but i'm making progress and sometimes i forget to take pictures. i have a few that i'll upload later.    and the other side - just need TIME to weld and grind... g'ah  i have 1.5 hrs set aside tonight if nothing pops up on the 'honeytodo' list oh man - i can taste it now... i did a full dry-run top fold down tonight. worked very well, but i have identified a few areas i need to tweak (grind to increase clearance) because they bind a little... i'm pretty impressed on how it comes off the windshield frame. as a side note - for those running this type of top in their speedster - it's a little alarming how close to the head all that metal is. i'm going to pick up some more pipe insulation and stick it on for when i travel with the top up (ie: no banging the crap outta your head getting in/out - never mind a car accident).     i can't do a lot more without making a hell of a lot of noise grinding. that's all for tonight folks. enjoy! well folks - the end (of the project) is near! i am more than happy with how this is turning out. uber flush folding:  header bow pokes up:  tonneau with two bow ends poking:  i'm going to trim / round them smooth like this:   well, my neighbors love me. 1.25 hrs of non-stop grinding and blending/smoothing the metal. but now - well now it's a work of art. i quite like this metal shaping process. full disassembly, grind rough welds, flap disc/ blend... i reassembled it - did another dry run, two areas i needed to tweak where there was contact - disassemble, weld, test fit again, success! it's sort of hard to gather how much time i have spent on 10 pieces of metal, but, they all fir together like a jigsaw puzzle now. i am going to do some body work on the frame to smooth out the welded areas that i can't reach with my flap disc (just like the DIY luggage rack i made). it is/has been fun figuring this out. Last night - i sorted out all the washers / nylon washers / stainless hardware (bolts & acorn nuts) i decided to lock-tight them on with the strongest lock-tight (red) instead of welding. welding is easier, but really limits your options and i don't think it will look as crisp against the painted frame. i am also going to paint it ivory to match my other interior parts. it'll be covered up when the tonneau is on. Anyway - as prep for the final product - i also added some body filler over the smoothed out welds to make 'em niiiice and smooth anyway - here are some pictures: hardware:  body filler on tabs:  everything disassembled for the final time: 
first - the measurements: 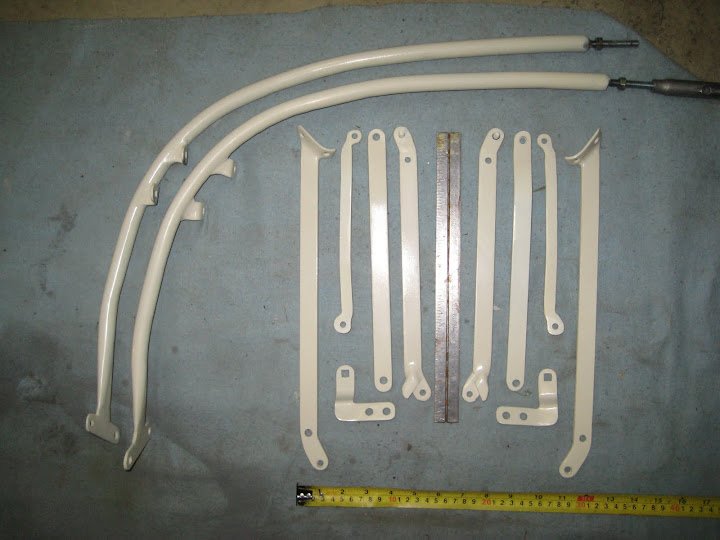
more: 


then the cleaning (paint thinner followed up with warm soapy water and a heat gun): 
then about to be installed:  assembly (the fun part): 

closer: 

oh baby: 

i couldn't be happier with the ivory/stainless hardware on my interior scheme 
(don't judge my mess of a garage - i literally cleaned it tonight :) ) 
folded down: 
 annnnnnnd: .... (keep in mind one of the primary goals was a flush fold down) .... with the toneau on: 


trimmed header bow: 
folded forward to clean: 
car's lookin a little cleaner (note my fire hydrant actually is mounted behind my seat - i brought it out for the first startup of the season the other day):  all that is remaining is to undo the bolts and lock-tight them on, but i am going to leave it like this for a while, just in case i need to disassemble it for some reason. oh - and feedback always welcome. the measurements pictures should drastically reduce the R&D the next fabricator (who's it gunna be??) also - i forgot to mention - i did end up using one piece of foam pipe insulation on the rear bow. it makes just *that* much of a difference on the tight-as-a-drum-top. |